CellScopes_Test
CellScopes Docker Installation notes
Updated: March 4th, 2024
OS_1: 22.04.1-Ubuntu x86_64
OS_2: macOS Monterey 12.7.3
Julia Version: 1.7.4
CellScopes Version: CellScopes.jl v1.0.0
Contact: Dian Li
- CellScopes Docker Installation notes
- Part 0. Introduction
- Part 1. Install Docker on Ubuntu (OS_1)
- Part 2. Pull CellScopes Docker Image
- Part 3. Run CellScopes in Docker
Part 0. Introduction
WARNING: sudo is required for installation
- The Docker installation in this notes was tested on both Mac and Ubuntu operating systems.
- Sudo access is necessary for installation.
- OS_1 (remote) serves as the host for the CellScopes Docker image
- While OS_2 (optional and potentially the same as OS_1) is utilized for accessing CellScopes through Jupyter Notebook.
Part 1. Install Docker on Ubuntu (OS_1)
- Please refer to the Docker website for guidance.
Part 2. Pull CellScopes Docker Image
-
The CellScopes Docker image can be found at the Docker Hub website.
-
To pull the image
sudo docker pull thehumphreyslab/cellscopes
Part 3. Run CellScopes in Docker
Option 1. Directly load CellScopes in OS_1
To begin with, CellScopes can be directly loaded within the Docker container:
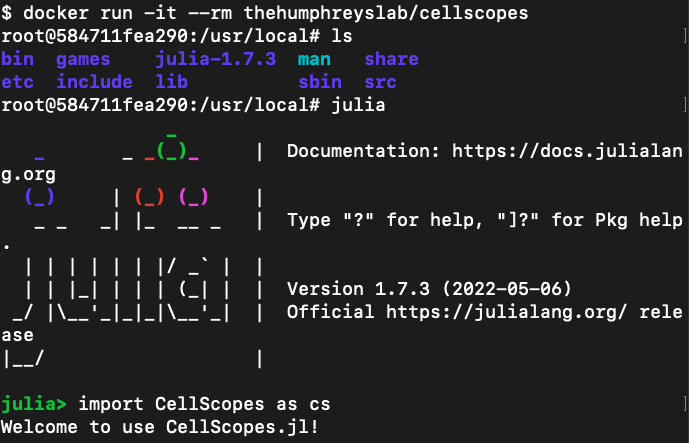
$ docker run -it --rm thehumphreyslab/cellscopes
Inside the container, enter julia interactive mode by typing ‘julia’:
root@xxxxxxx:/usr/local# julia
Inside julia interactive mode, import CellScopes by:
julia> import CellScopes as cs
Here is a snapshot for the operations mentioned above
Option 2. Directly load CellScopes in OS_1 and mount a volume for data access
To connect a directory on OS_1 with the Docker container, we can:
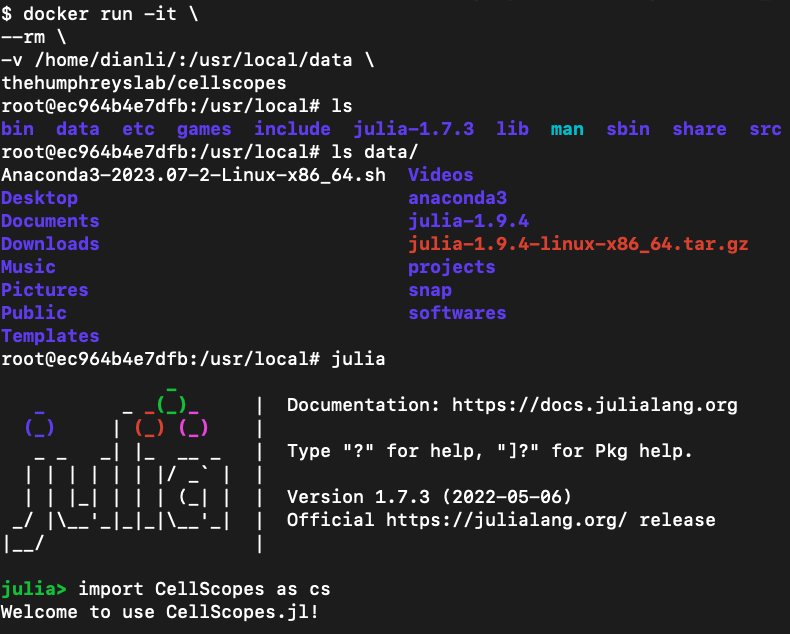
docker run -it \
--rm \
-v /Directory_To_Mount:/usr/local/data \
thehumphreyslab/cellscopes
The data stored on OS_1 could be accessed via /usr/local/data/ inside the container.
The rest of the procedures are the same as in Option 1.
Here is a snapshot for the operations mentioned above
Option 3. Load CellScopes in a remote server OS_1 and access the container from a local terminal OS_2 via Jupyter Notebook
In some cases, we might need to remotely access the CellScopes Docker container from a second machine OS_2.
Option 3 is inspired by this tutorial written by edinhon.
Three port numbers
To begin with, we describe the meaning for 3 ports to be used for setting this connection.
- port2:5237
- Port reserved on the remote machine OS_1 to convey information among the Docker container, OS_1, and OS_2
- port3:5237
- Port predefined in the Docker container to communicate with OS_1
- port4:8020
- Port reserved on the local machine OS_2 to communicate with OS_1. Examples of OS_2 can be your personal Mac or Windows laptops. The value 8020 can be changed to others depending of the available ports on OS_2
Port 5237 was predefined
To be noted, port 5237 was predefined when the CellScopes Docker container was built. If it conflicts with the port 5237 on your machine OS_1, where the Docker image is installed, please send a request to us. We are happy to provide a Docker image with an alternative port reserved.
Connect via Jupyter Notebook
Here are the code for making the connection
### assume your account on OS_1 is
### doe@10.10.1.1

### On OS_1
docker run -it \
--name cellscopes \
--rm \
-p 5237:5237 \
-v /Directory_To_Mount/:/usr/local/data \
thehumphreyslab/cellscopes
/Directory_To_Mount/ is the directory on OS_1 where data is stored.
After entering the Docker container, start a new Jupyter Notebook by
### inside Docker container
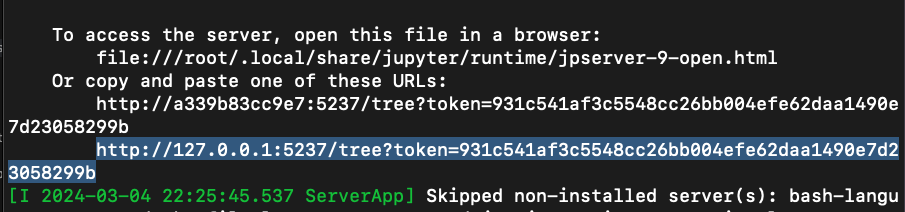
jupyter notebook --ip 0.0.0.0 --port=5237 --no-browser --allow-root
If OS_1 and OS_2 are on the same machine that equips with a web browser.
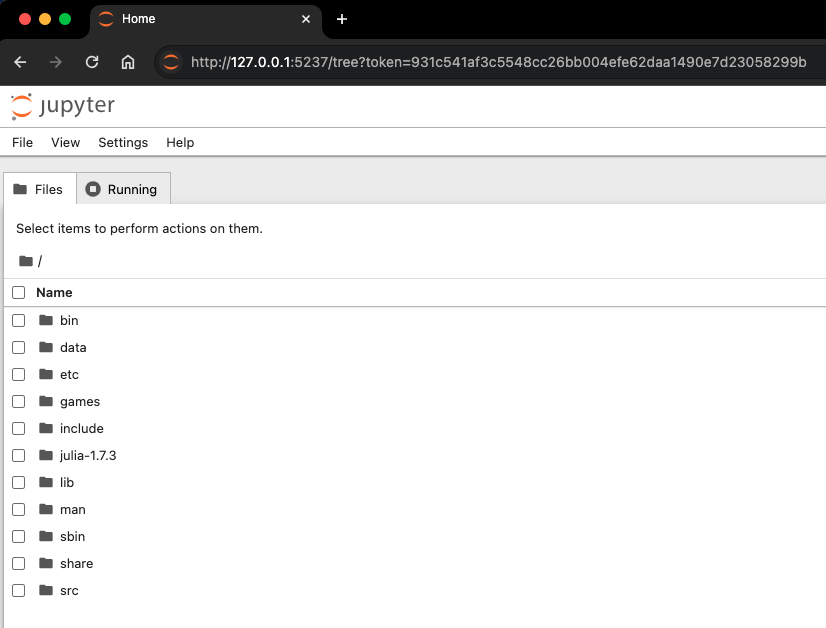
Then directly copy the html link together with the token in the Jupyter Notebook prompt, and paste to a browser to open it.
Here are snapshots of creating a Jupyter Notebook connection when OS_1 and OS_2 are indeed the same machine:
If OS_2 is a different machine than OS_1 that equips with a web browser.
First, start to listen to port 8020 on OS_2. Values other than 8020 are also workable.
lsof -ti:8020 | xargs kill -9
ssh -NfL 8020:localhost:5237 doe@10.10.1.1
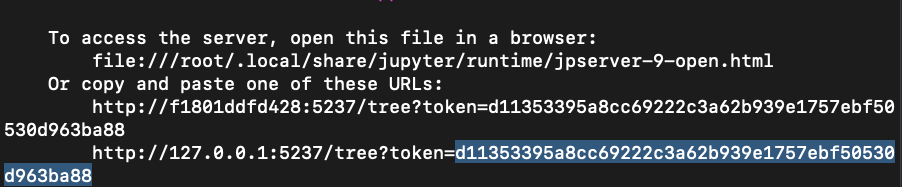
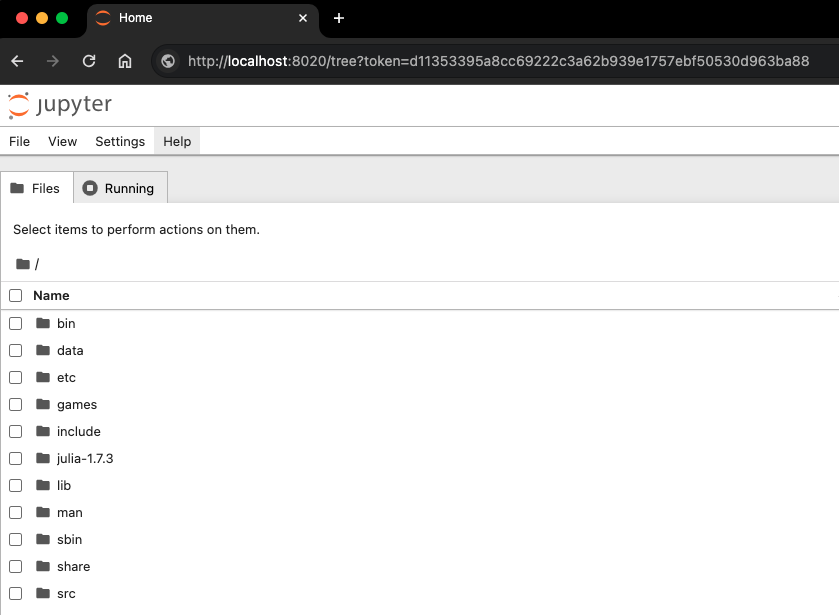
Second, copy the token shown in the Jupyter Notebook prompt, and paste to a browser using this IP address:
http://localhost:8020/tree?token=The_Token_Copied_From_Jupyter_Notebook
Then it should work!
Here are snapshots of creating a Jupyter Notebook connection when OS_1 and OS_2 are different machines:
[END]